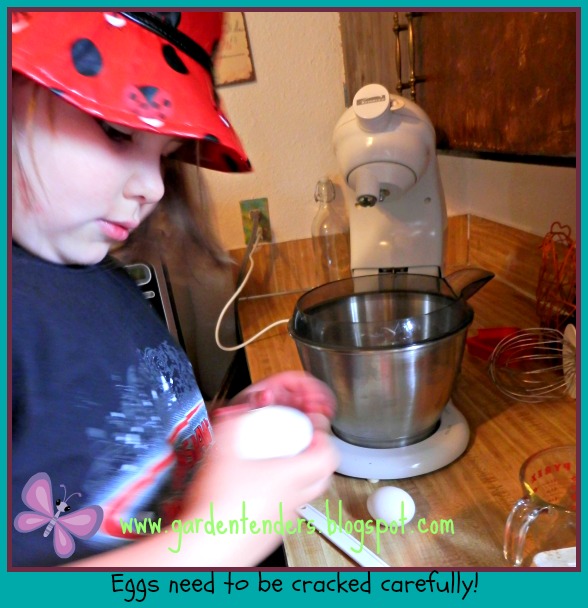
Showing posts with label education at the counter. Show all posts

Tuesday, January 28, 2014

Laundry Day


Since early fall I have been out of homemade soap.  I have been putting off making it.  Why?  Oh I have literally no idea.  It only takes about a half hour of my time and its literally pennies a load.

The recipe can vary from source to source.  One person told me she uses 1 bar of Felsnaptha and 6-8 cups of borax and washing soda.   My recipe is a little different and this time when I made it I varied it a bit more, I am bad when it comes to following a recipe.  Additionally, I use a regular food shredder rather than a fine grater because of a hand injury which would prevent fine grating.  After grating I chop as well.

Kim's Laundry Suds Soap Recipe

Ingredients:
1 bar of Fels-Naptha or Zote soap
1 cup of Boarx
1 cup of Washing Soda
1 cup of Baking Soda
1 cup Laundry Crystals --Optional

Directions:
Place borax, washing soda, and baking soda in a large bucket or bowl.  Grate the bar of soap (with a food grater--fine if you can) and add it to the powder mix in the bucket.  Add the optional laundry crystals if you like.  Mix well with a large wooden spoon.


For use in laundry, add 1 Tbsp for a regular load of laundry (2-3 Tbsp if dirty or large) --if desired and using cool water dissolve the laundry soap first in a pint of warm water.  

Hubs only complaint with this laundry soap has been lack of scent.  The crystals take care of that problem!


You will buy a box of each of the powders and it will make several batches.  The Fels-Naptha runs around a dollar a bar.  I figure each batch cost about $3 and will wash about 70-75 loads. 
I say thats pretty good.


Friday, May 31, 2013

Bear Designs: Applesauce Cupcakes!

Bear has been very kitchen orientated lately.  In the past couple weeks she has made brownies, peach pie, applesauce cupcakes, and more....

Saturday morning she surprised her Daddy with homemade applesauce cup cakes. 

 
Here is the recipe we used, although we were missing cinnamon, we had run out.  They turned out great.  Bear is beginning to be the little baker!


Bears Applesauce Cupcakes!

1 3/4 cups flour                                           

1 teaspoon baking soda
1 teaspoon ground cinnamon
1 teaspoon ground nutmeg
1/2 teaspoon allspice
1/2 cup butter, softened
1 cup sugar
1 egg
1 cup unsweetened applesauce 
1/2 cup of pecans or walnuts (optional)


Mix flour, baking soda, cinnamon, and nutmeg together until they are combined; set aside.  Next, in a mixer, beat butter and sugar until creamy; add egg and beat until fluffy.  Stir in the applesauce.  Mix well.  Gradually add flour mixture (dry ingredients) and mix until well blended. 
 
Spoon batter into a cup cake pan.  Make sure to use paper liners or grease well.  Fill each liner about 2/3 of the way full.  Bake in the oven at 350 degrees for approximately 20 minutes (until top spring back when lightly touched.  Let cool and enjoy!
 
Skills learned:
  • Following directions
  • measuring and counting
  • patience
  • recalling past lessons....the applesauce was homemade so we discussed the applesauce we made as well.
  • and more.... 

Bear did most of the measuring, pour, mixing, and more on her own.  All I really did was read the recipe for her and point out what was what when she needed it.  Such a big helper!


What kinds of things have you created in the kitchen lately?

Friday, May 17, 2013

Better for you No-Bakes


Better for you NO-BAKES
The secret ingredients

1/2 pure unsalted butter
1 cup of grade B maple syrup
1/4 cup of cacao powder
1/2 cup of non-homogenized milk (cream removed if you like)
1 tsp. of pure vanilla (we have made our own recently)
1/2 cup of peanut butter
2 1/2 to 3 cups of
quick oats
1 cup of flaked coconut

Place first four ingredients in a sauce pan and place on medium heat stirring occasionally , allow to come to a rolling boil for 2 1/2 - 3 minutes (this seems to be based on humidity, elevation... just eyeball it).

While this is happening cut some parchment paper (or waxed paper though I like parchment) and place it on the counter.

Remove from heat and add the final four ingredients.

Mix well.


Use a large spoon, like a soup spoon, and place "mounds" of cookies unto the parchment paper to cool.


Enjoy.

This makes about 14-20 cookies depending on how big you make them.

The proof is in the enjoyment though.  They are a little on the soft side, but otherwise they did great!  So while they are not wheat free or diary free they are better for you!

Bear really enjoyed helping with making these, she enjoyed sampling them even more!


Hearts for Home Blog Hop
 
 
Links to Amazon are affiliate links.  Thank you for supporting my book habit!


Monday, May 13, 2013

Frugal is....


Making applesauce in 2012
Frugal....  When I was young we just called it cheap.  Yes, I'm cheap... sometimes... but frugal is more than that.  Frugal is doing the best you can for the least amount of impact upon your families wallet and, I will also include, the environment. 

Canning... 

Yes I can a lot of things.  I grow a lot of things and save seeds as well.  This all leads to a more frugal lifestyle.  Not only does it mean I save money (caution....don't go into canning the first year thinking you will save money) but I also lessen our "carbon footprint".  Here is a link to all things canning on Amazon (yes it is an affiliate link).  I will tell you which things I believe are essential, some that are still on my wish list, and great add-ons for when you come into some money, or Great-Aunt Betsy gives you a big check and tells you to buy something for yourself!  We can dream!

MUST HAVE!

Water bath Canner.  You can use a big pot, the oven, or something similar but the best and safest method in our home is the good old canner.  Doing the other methods have often resulted in broken jars, wasted time....  Which causes more frustration.  If you are canning in the dead of summer when the veggies are coming on, this can lead to nothing but heartache.  For Mother's Day, Birthday, or just because, ask for a canner.  If all else fails, buy one yourself.  Its a MUST have.  I even water bath can my jam and jelly, though technically you wouldn't have to.  My grandmother rarely did, she used paraffin to seal the jars, glasses, etc. 

Pressure Canner....  Some things MUST be pressured canned.  Unless you are trying to plan the demise of the neighbor that stays up until 4 am next door, blasting loud music every night while reeving his straight piped Harley.....  But even then...  yeah, safer to pressure can if you are doing something that MUST be prepared this way.  Like green beans, meats, soups, sauces....  Now, you could just buy the pressure canner if you have the funds and know you will use it...I have used my old pressure canner for a water bath canner as well.  You can do this successfully--though I prefer to have separate myself-- if you could only buy one. 

Home Canning Kit....  This will save you more time and heartache.  Otherwise you may find you need "mommy juice" by the bucket while canning.  I have burned myself more than once not having a jar lifter and this kit has one of those, the needed funnel --yes a funnel for the jar is a MUST because few of us are careful-- and something I still want to get, a magnetic jar lid lifter.  The jar lid lifter is not a MUST, but I think it could quickly become a real strong want.  It will be on my list this year.  It has been a wish for the past couple years and I just haven't broke down and bought one yet.  Buy the kit,  it's cheaper and frankly, a well spent $12.

Jars....  You can't can without them.  I have begged, borrowed, and bought brand spanking new jars, as well as jars at used stores.....  Unless you can get your jars for free or really cheap, buy new.  As much as I abhor nearly all things Wal-Mart, you can get a decent box of jars there generally under $10 a dozen (pints).  Lets say someone at a garage sale has some and they are charging 25 cents a jar, unless your lucky and it includes the rings, you are only getting part of what's needed.  You need rings and lids.  These can run you around $4 a dozen.  When you buy rings/lids make sure it includes both rings and lids.  For used jars you might end up paying about $7-8 dollars a dozen.  This price break down is based on pint sized jars.  Used jars might have nicks in the top of the jar so check that out before buying.  The true cost savings is in inheriting Aunt B's canning jars, or in saving your jars for the next year.   Its really just preference, used verses new.  If you happened upon an estate sale and could score several dozen canning jars for a few dollars, go for it.  If you are just canning a handful of things, maybe buy new jars.  My used jar search continues every year....   I almost always buy new because you can only search so long, and I seem to always need pints or jam jars. 

(A note to local friends and family:  If you return jars and rings to me, I am more than happy to refill them for you when I can again!  Sometimes I might even have that yummy jam already waiting for you.   Please be kind and return canning jars!)


Blue Book...   If there is such a thing as a canning bible, this is it.  Its my go to canning book.  I have other favorites but if I need to make sure something is the right time or pressure, this book will tell me.  I have one from a few years ago and should probably update it soon but I would be slacking if I didn't recommend every home canner having one.

WANTS!  And boy howdy, does my wish list get big.....  even a few things I would like to add this year....
  • Canning Bubble Popper and Measurer--I have been using a butter knife  *grin*
  • Stainless Steel Canning Ladle--I use a soup ladle but a dedicated one would be a nice thing to have.
  • Canning Lid Rack (I had one but last year it broke, so I know how missed this can be! Though it isn't essential)
  • Food Press
  •  Magnetic Lid Wand
  • Dissolvable Labels for the jars.
  • A portable propane stove for canning.  Of course a summer kitchen would be AWESOME!  A dream of any home food preparer.   

Canning can be a frugal way to go for your family but its by no means free or nearly so as it was for our great-grandmothers.  Good healthy food can be pricey, and growing it yourself can be costly in many areas.  Sit down and figure out how much time you devote, the cost of seed, water, etc.,  and the cost of the raw product if you do buy it and the other needed ingredients and you will be surprised. 

The biggest benefit and why I consider canning frugal living are the intangible things.  Things that can't be quantified with dollars and cents.  Healthier food for your family; the satisfaction felt when looking at your shelves full of homemade food; better for the earth that God gave us; independence and self sufficiency felt; and a sense of accomplishment, a job well done.  I wont even go into all the rich learning experiences that are provided when you produce your own food.  Let's just say that its ripe with experiences that money can't buy.  This is frugal living. 

Of course later I will discuss making other products for your family that don't involve canning.  Even what I learned while trying to learn extreme couponing.....  and I will discuss the need for a well stocked pantry of foods your family will eat, this different than a well stocked pantry of MRE's and dehydrated foods prepared for the Zombie invasion. 

Welcome Home Wednesdays


(Links are affiliate links--Thank you for helping to keep me in coffee and assisting in my book addiction!)

Friday, May 10, 2013

Making Body Butter

Bear Bottoms Body Butter!
Yes you can pin this image, but don't steal for your own blog or web site without credit!
With our trying to eat more whole, i.e., less processed diets, we have also included less processed household items as well.  Enter, Bear Bottom Body Butter --for a Healthier You.....  Nicknamed Bear Bottoms.  *grin*

Pictures tell a thousand words, so my words in telling the story of making Bear Bottoms will be few.  I know, I'm not gonna be long winded!  *grin*

First:  We made a label in Publisher.  Simple and straight forward template. 


Second... Gathered all our ingredients. 

1 cup Shea Butter 
1/2 cup Coconut Oil 
1/2 cup Olive Oil (infused if you like, I am also told that almond oil is nice as well)
20 drops of your favorite essential oil(s). 

I found the recipe at Natural Living Mamma.


Don't be alarmed.  This Shea butter is raw unprocessed and looks different than the processed stuff I am told.  I am also told that it can vary in each batch.   
 
 
Instructions. 
  • Melt the shea and coconut oil together using the double boiler method.  A smaller pan within a larger pan works great.  Just make sure water doesn't get into the oil/butter.
  • Once its completely melted remove from heat, add the olive oil and essential oils and let set until cool. I ended up letting it cool in the fridge.  If you are using a stand mixture you can let it cool almost solid but if not you might want to let it still be a little on the soft side for the next step.


  • Next, you will want to beat the mixture until it begins to turn whitish and form peaks.  This is a LONG time.  Much longer than you think it should take.  My shea, olive, and coconut oil mixture never got really white, more cream colored. 
 
 
  • Finally, you can put the Bear Bottom Body Butter into a pretty glass container, or if you want, a Ziploc style storage container.  Something that holds the body butter.  It makes roughly 2 1/2 cups. 
We found this little jar with a seal on it at the dollar store.  It holds about a cup.  We put the label on it and tied a ribbon around it and are giving it to an Aunt for Mother's Day.  There is time to do this project for Mothers Day with your children!  Have fun! 

This body butter is literally awesome!  A little bit goes a long way.  It starts a bit oily when you put it on and you might be thinking, "WHAT HAVE I DONE!" but your skin quickly drinks it in.  Your skin will love you!  I have been using it on some patches on Bear and she has been loving it.  My arms and elbows have been extremely happy as well. 
 
Good luck with your Bear Bottom Body Butter! 


Saturday, August 25, 2012

Using your abundance

ZUCCHINI!  Yeah its that time of year.  That little green summer squash is becoming prolific and we love it!

A while back I posted about making a Zucchini based pizza crust and thought I would share the recipe again here.  Something Bear and I have done together.  This was something she actually ate without any sideways looks.... 

What do you do when you have a bushel of ZUCCHINI? Well one thing you can do is MAKE PIZZA!  Yes, I made a  pizza crust out of grated zucchini, and I will add that it was a hit with the family. Very filling and a great meal. The recipe is from my Moosewood Cookbook. If you are ever looking for a vegetarian cookbook, check it out!

Anyway, here ya go!

Zucchini Pizza Crust

Print Here
Crust Ingredients:
olive oil and flour for the pan
2 cups (packed) grated zucchini --about 2 medium zukes (next time I am trying them chopped)
2 eggs, beaten (okay to delete one or both yolks)
1/4 cup flour
1/2 cup grated mozzarella
1/2 cup grated Parmesan
Optional: pinches of basil, marjoram, and/or rosemary
2 T. olive oil
Pizza sauce and whatever other toppings you prefer

Directions

1) Preheat oven to 400 degrees F. Generously oil a 10-inch pie pan and coat lightly with flour (You can also use a jelly roll pan)
2) Combine zucchini, eggs, flour, mozzarella, Parmesan, and herbs, and 1 T olive oil in a bowl and mix well.
3) Spread into the prepared pan and bake for 35-40 minutes, or until golden brown. About halfway through the baking, brush with the remaining tablespoon of oil (optional). Remove from oven. When it has cooled for about 10 minutes, use a spatula to loosen the crust from the pan, so it won’t break later.
4) Top with your favorite pizza items and bake at 400 degrees F until heated through. The crust can be made up to several days in advance.

This is everything all mixed together


Of course it became an educational experience. Sarah helped me grate the zuckes in the big old food processor as well as crack and mix eggs and then we mixed the ingredients together, put on a pan and cooked it. Afterwards we put on regular pizza toppings (a little too much cheese, but still good).

Try this one pizza Friday.  While it might not replace your regular crust it is a good change to make sometimes.

And if that ins't enough zuke in one week for you, you can try this:  ZUKE POPS!

I made zucchini pops one night.  They were a big hit, they went over better than the pizza crust which was a hit as well.    I adapted the recipe from something I found here, at The Curious Country Cook.

My recipe for what I call 'Zucchini Pops' is below:
2 medium zucchinis chopped (approx 2 cups)
1/2 cup of chopped onion
1 cup of shredded cheese (mozzarella, Parmesan and Romano mixed together if you have them all)
2 eggs, lightly beaten
3/4 cup of Italian bread crumbs
1 tsp of garlic
2 tsp of Italian seasoning

Preheat the oven to 400 degrees. Lightly oil a mini muffin tin.

Chop zucchini and onion place in a medium size mixing bowl. Add the eggs, bread crumbs, seasonings and cheese and mix together. Use a spoon or a small cookie scoop and fill the cups of the mini cupcake tin. Place in oven and bake at 400 degrees for about 20 minutes depending on oven. When done remove and eat like you would a potato pop. Enjoy!

(sorry I didn't get pictures of the family enjoy this yummy item).

Happy cooking!


Tuesday, August 21, 2012

Education At The Counter: Semi Homemade Tomato Soup

This is one of my go to, easy quick and filling meals.  Semi Homemade Tomato Soup and Grown-Up Grilled Cheese.  I know it isn't completely homemade and while not really good for you it is wholesome and better than take out or as the Hubs says, "Hello Dominos..."

What you need to get started:
Soup:
Canned Tomatoes (diced)--1 pint Jar or 1 can (or you can do two cans/jars)
1 can of condensed tomato soup
Garlic cloves or crushed garlic
Cream Cheese (softened 8 oz)
Onions
Butter
Milk
Large pot

Grilled Cheese:
3 types of your favorite cheese
Onions
Bread
Butter
Skillet/griddle

So in the sauce pan/pot melt one pat of butter and gently saute onions (diced) and crushed garlic.  To that add in your canned tomatoes.  Add in softened cream cheese, mixing well.  Add condensed soup and 1 cup of milk.  Slowly simmer in the pot while you create the yummy sandwiches.

The grilled cheese are made just like a regular grilled cheese, the only difference is what you put on them.  I like onions, but have also added green peppers before when in season.  Grill in the skillet turning as needed.  Don't be skimpy on the cheese or the onions.  This is what makes them grown up.  The 3 or more types of cheese is a key component as well.  I have used pepper jack, muenster, provolone, cheddar, swiss, colby jack, mozzarella....  whatever strikes your fancy. 

This is a really easy meal to create with kids in the kitchen.  My daughter easily helps to pour and stir, dump and whisk....  fun for them as they take a strong role in helping to create the evening meal.  These types of actions help with cordination. 


Now I am hungry again! 

Linking up this week with Heather over at Upsidedown Homeschooling and
What Works Wednesday because this really satisfies my hubs hungry tummy!


Sunday, August 12, 2012

Education at the Counter

We have had an abundance of kale in our garden.  I planted kale to use in juice and I had no idea how prolific it would produce.  Next year I will know better.  *grin*

I had seen several pins on Pinterest about kale chips and decided to make some.  They were really actually very easy to make.  I tried a couple different seasoning flavors for the two different batches that we made.

Bear and I rinsed our fresh picked kale and we placed our rinsed kale into our salad spinner.  After cleaning the kale I drizzled a little bit of olive oil on the kale and then Bear placed the kale on a parchment paper lined cookie sheet.  After we laid the kale out I let Bear sprinkle seasoning on it all.  I used an Italian season blend and later we used a garlic and Parmesan cheese blend. 

We baked the kale at 350 degrees for about 20 minutes until they were crispy but not burnt. 

I thought they tasted alright.  Bear refused to eat them after the first bite.  *laugh*  I still plan to make some more with the hopes that she will develop a taste for them, but I do have to agree, they are nothing like pringles.  The two batches we have made so far were not very impressive, but not nasty tasting either, just different.


Have you tried kale chips yet?  Please share.

Next week education at the counter will share our recipe for A Momma's Semi-Homemade Tomato Soup and Yummy Grilled Cheese sandwiches.

Wednesday, July 25, 2012

Cooking and playing together

We have fun cooking together.  We do, of course the Bear has a shorter attention span so we keep the things we cook together pretty easy, but it's an environment rich in learning opportunities as well.  I have written many posts about it, like here.

You can have fun cooking with your children too, yes you can!

So I am going to share a few fun dishes Bear and I have prepared together; for you know, a family that cooks and eats together stays together.  We build stronger relationships around the dinner table and when things come up in life, as they have a tendency to do as children age, a kitchen and the dinner table can be a handy tool in keeping communication lines open.  Even homeschool kids go through periods of time when talking to Dad and Mom is "uncool" and even scary depending on the topic.  However, if we have that solid time spent together sharing a common task and a common hour of time without any interruptions from phones, TV, computers, etc., the communications lines are more stable.  It's never too late to start, although habits are hard to break.  If you are new to the family table time idea, begin with just a few days a week, and slowly work up to having it be a nightly event.  Growing up I clearly remember dinner lasting well into the evening as we would discuss days events, politics, religion, sibling issues, etc.  It was just natural and if there was a squabble amongst my siblings and I, it was generally hashed out at that time.  But generally it was a time of sharing the days events and goals, ideas and philosophies.  Our meals were a time of family fellowship. 

I'm not sure if this idea stemmed from my father being an only child in an era when dad played a small role in the family outside of being a "provider" and my mother growing up in a house where children were seen and kept quiet or not.  They encouraged vocal exchanges in our home, we could disagree--and often did, as teenagers are apt to do.  With gusto. 

Here are a few of our kitchen adventures.

In the fall we "put up" several quarts and pints of
homemade sugar free, all natural, apple sauce.
In December we made goodie boxes for neighbors,
hubs work and family members

Zucchini Pizza. Here we made a pizza crust out of some zucchinis
that we had gotten in a fresh food box we ordered.
It was yummy and a dish I plan to make again this summer.
A much friendlier "healthy" food than the kale chips we made recently (more about that later).
Of course bread has been a weekly task with our education at the counter. 
We have made more loaves than I can begin to count in the past year alone. 

We also got 100% unhealthy a few times and one of those time we created this desert. 

Bear having fun grinding the oreos into crumbs.... 
I think a few escaped their grinding fate
 and ended up in a certain girls belly.

Here we decorated cookies for a valentine's day party
with our homeschool friends.


Valentines day we created a special dinner for the Hubs/Daddy.
She enjoyed working with the chocolate.
The raspberries were a hit and several were ate
before they made it onto the cake


Mixing and baking, baking and mixing.
Along with this we have been forming a bond and relationship.
Her chatter keeps a constant tempo as we crack, stir and mix.


This dish was a hit with everyone. 


We have made a few batches of Kimchee.
Something the hubs thoroughly enjoys. 
Plus its a nice raw fermented dish, good for the tummy. 

Making no bakes!  Yeah we like chocolate around here.


Lunch can be fun together.

Cupcakes for the fourth of July!


A special request during our July week of learning about Independence...
It is suppose to be red, white and blue, although the noodles aren't that white.
A few links to past lessons at the counter are: 
Linking up today with Summer Connections over at Our Good Life.


FamilyConnectionSummerbutton5

Happy tending gentle friends!